When the sun is blazing and the humidity reaches its peak, the last thing any home cook wants to do is preheat an oven to 350°F (175°C). That is where the magic of No-bake summer desserts comes into play, offering a refreshing sanctuary of flavor without the kitchen heat. This particular recipe isn’t just a dessert; it is a structural masterpiece of textures, from the buttery snap of a golden crust to the ethereal cloud of whipped cream cheese.
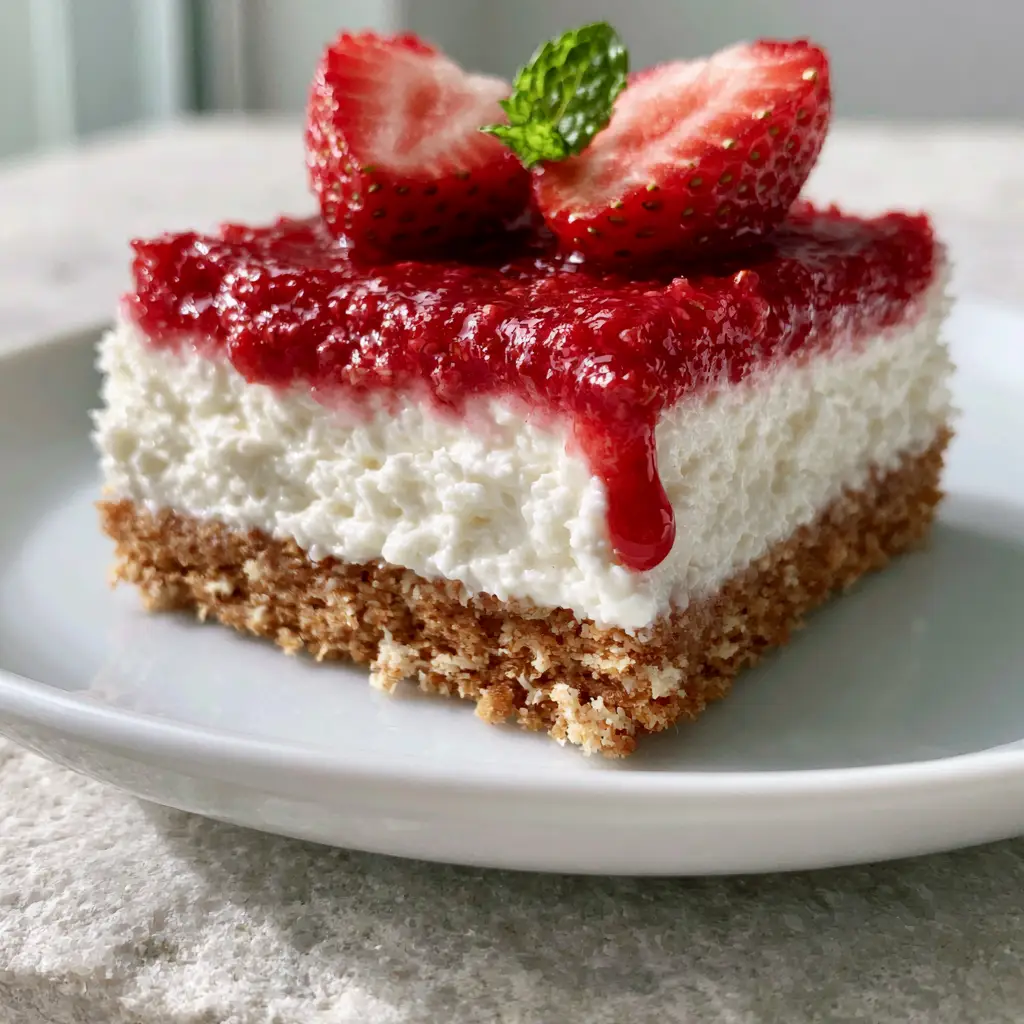
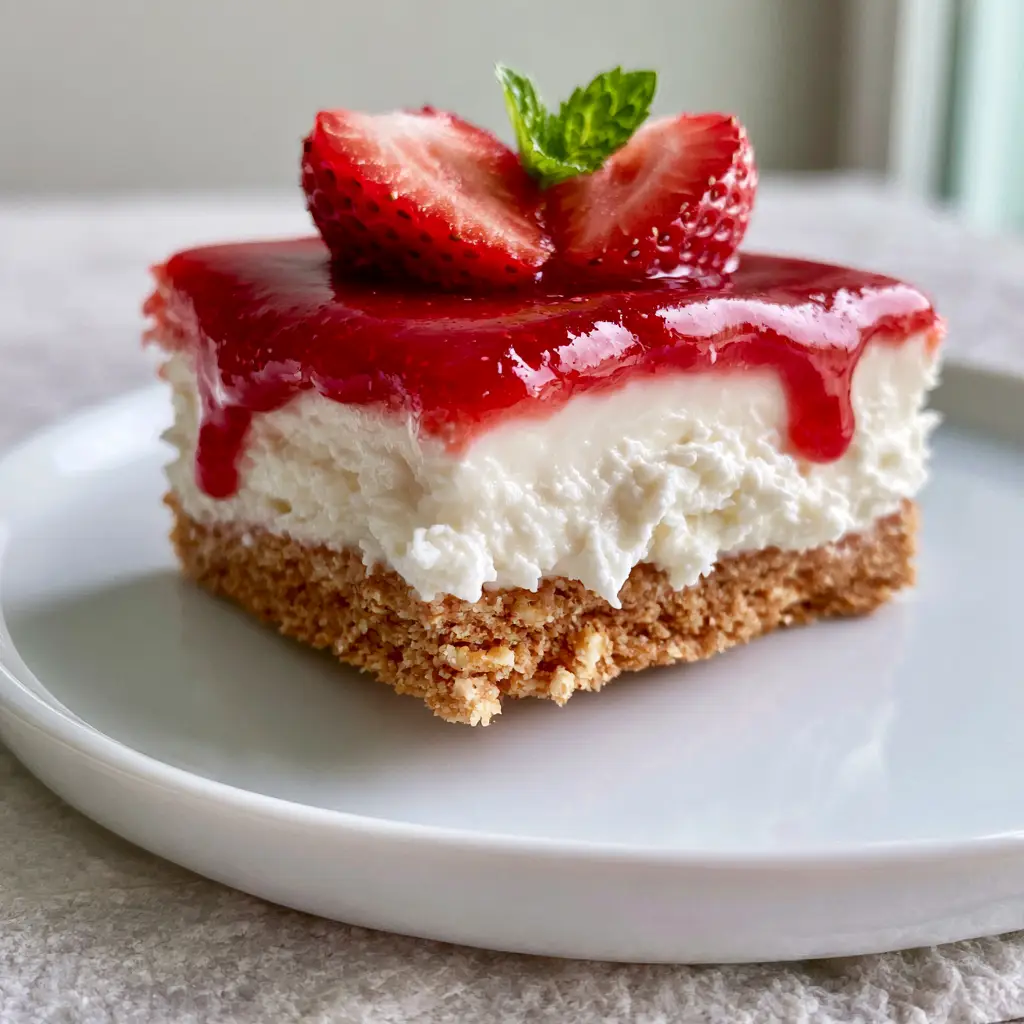
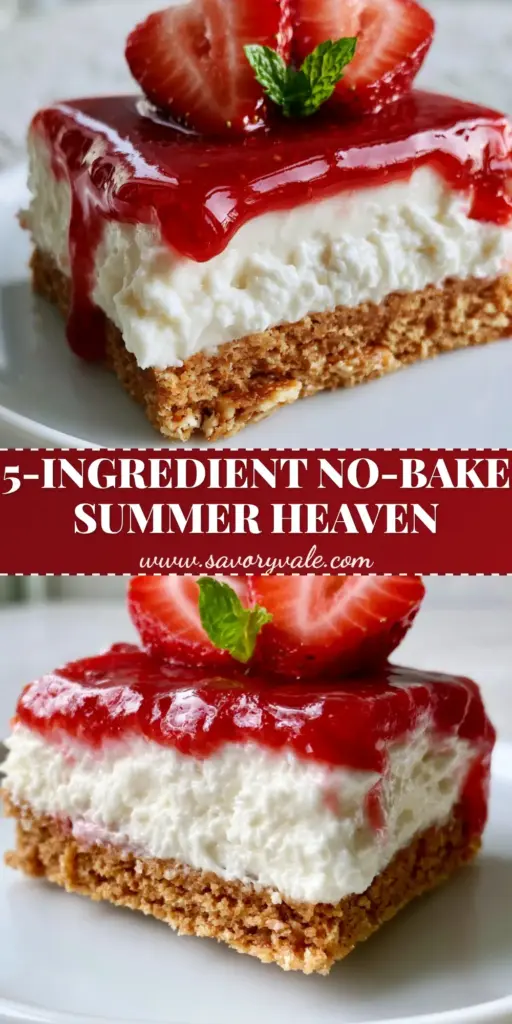
Imagine a thick, 2-inch (5cm) layer of snow-white filling, so velvety it practically melts on the tongue, topped with a ruby-red glaze that shimmers under the light. Whether you are hosting a backyard barbecue or looking for a elegant finish to a patio dinner, these chilled bars provide the ultimate sensory relief. The contrast between the dense, buttery crumbs and the glossy strawberry topping creates a professional-grade aesthetic that looks like it came straight from a high-end patisserie.
Why This Chilled Masterpiece is the Queen of No-Bake Summer Desserts
- Textural Trifecta: You get the crunch of the dense graham cracker foundation, the airy “melt-in-your-mouth” whipped center, and the viscous, tongue-coating strawberry glaze.
- Visual Showstopper: With its high-contrast layers and vibrant fruit garnish, this dish is designed to be the centerpiece of any summer spread.
- Heat-Free Harmony: From the crust to the glaze, every component is engineered to set in the refrigerator, keeping your home cool and your stress levels low.
- Make-Ahead Mastery: This dessert actually improves with time, allowing the flavors to meld and the structure to firm up over 6-8 hours of chilling.
If you love the ease of heat-free treats, you might also enjoy our decadent no-bake Oreo dessert, which offers a chocolatey twist on the chilled bar concept. For those planning a full seasonal spread, these bars pair beautifully after a light meal of chickpea feta avocado salad or other chilled summer appetizers.
The Essential Architecture: What You Need for the Perfect Strawberry Bar
Graham Cracker Crumbs: 2 cups (170g). These provide the structural “floor” of our dessert; ensure they are ground finely to create a dense, golden-brown base that holds its shape when sliced.
Unsalted Butter: 1/2 cup (115g), melted. The “glue” of the crust, providing a rich, savory counterpoint to the sweet filling and ensuring the crumbs don’t scatter when you lift a bar.
Full-Fat Cream Cheese: 16 oz (450g), softened. For that iconic snow-white, velvety texture, you must use blocks of full-fat cream cheese; it provides the lactic tang and structural integrity required for a 2-inch thick layer.
Powdered Sugar: 1 cup (120g). This dissolves instantly into the cream cheese, ensuring a perfectly smooth mouthfeel without the grittiness often found with granulated sugar.
Heavy Whipping Cream: 1 cup (240ml), chilled. This is the “secret” to the whipped texture; when folded in, it aerates the dense cheese into a cloud-like consistency.
Fresh Strawberries: 1 lb (450g). Half will be transformed into a glossy, ruby-red glaze, while the most “picture-perfect” ones will be halved for the final garnish.
Cornstarch: 1 tbsp (8g). This is the invisible hero that thickens our strawberry puree into a thick, glossy glaze that is stable enough to drip slowly down the side of the bar without running off.
Fresh Mint Sprigs: 4-5 small leaves. These provide the essential pop of bright green color that makes the ruby-red strawberries visually “sing” against the white filling.
Pro-Level Tools for Chilled Dessert Success
To achieve the professional “sharp edges” seen in high-end food photography, you will need a 9×9 inch (23x23cm) square baking pan. Lining this pan with parchment paper, leaving an “overhang” or sling, is crucial for lifting the chilled block out without damaging the delicate glaze.
An electric hand mixer or a stand mixer is non-negotiable for the filling. You need significant power to aerate the cream cheese and whip the heavy cream to stiff peaks. Finally, a small offset spatula will help you level the filling into that perfectly flat, 2-inch (5cm) thick middle layer.
Step-by-Step: Constructing the Golden Foundation
Engineereing the Graham Cracker Crust
In a medium bowl, combine 2 cups (170g) of graham cracker crumbs with 1/2 cup (115g) of melted butter and a pinch of salt. Mix until the texture resembles wet sand—when you squeeze a handful, it should hold its shape firmly.
Press the mixture into the bottom of your prepared pan. Use the bottom of a flat measuring cup to pack it down with significant pressure; a dense crust is the only way to support the heavy layers of cream and fruit above it. Place the pan in the freezer for 15 minutes to “flash-set” the butter while you move on to the filling.
Whipping the Snow-White Filling
In a large bowl, beat the 16 oz (450g) of softened cream cheese with 1 cup (120g) of powdered sugar and 1 tsp (5ml) of vanilla extract. Continue mixing until the mixture is completely smooth with no visible lumps; it should look like thick silk.
In a separate chilled bowl, whip 1 cup (240ml) of heavy cream until stiff peaks form—look for the cream to hold its shape firmly when the whisk is lifted. Gently fold the whipped cream into the cream cheese mixture using a silicone spatula. The goal is to keep the air in the mixture, resulting in that 2-inch thick, velvety, whipped texture. Spread this over the chilled crust and smooth the top with your offset spatula.
Cooking the Glossy Ruby-Red Glaze
While the filling sets in the fridge, blend 1/2 lb (225g) of strawberries into a smooth puree. Strain through a fine-mesh sieve into a small saucepan to remove seeds, ensuring a crystal-clear, glossy finish. Whisk in 1/4 cup (50g) of sugar and 1 tbsp (8g) of cornstarch mixed with a splash of water.
Heat the mixture over medium-low heat, stirring constantly. You will see a physical change: the liquid will turn from a cloudy pink to a translucent, deep ruby-red and begin to thicken into a viscous glaze. Once it coats the back of a spoon, remove from heat and let it cool completely to room temperature. Pour the cooled glaze over the cheesecake layer, tilting the pan to ensure edge-to-edge coverage.
Expert Tips for Visual and Structural Perfection
- The “Clean Cut” Secret: For those perfect, handheld bar edges, wipe your knife clean with a hot, damp cloth between every single cut. This prevents the white filling from smearing into the red glaze.
- Temperature Control: Never pour warm glaze over the whipped filling. If the glaze is even slightly warm, it will melt the air bubbles in the cream cheese, causing the layers to collapse.
- Patience is the Key: While it’s tempting to slice into these after an hour, a full 6-hour chill is what creates the “dense but soft” texture that allows the bar to be held aloft without falling apart.
- Stability Tip: If your kitchen is particularly warm, you can add 1 tsp (3g) of unflavored gelatin to the whipped cream to ensure the 2-inch layer remains upright during serving.
The Best Pairings for Chilled Summer Entertaining
These bars are the ultimate conclusion to a warm-weather menu. If you are hosting a full cookout, start your guests with savory bites like bacon wrapped little smokies or a refreshing cucumber ranch salad. For a picnic-style gathering, serve the bars alongside a classic southern potato salad and some cowboy caviar dip with chips.
If you have extra strawberries and want to keep the “no-bake” theme going, consider layering them into a key lime pie trifle for a different textural experience. For the kids, a side of lemonade puppy chow provides a zesty, crunchy snack to balance the creamy cheesecake.
Frequently Asked Questions
Absolutely! In fact, they are better if made 24 hours in advance, as it allows the crust to set firmly and the strawberry flavor to deepen.
Yes! Frozen strawberries work perfectly for the cooked glaze. Just ensure you simmer them long enough to reduce any extra moisture before adding the cornstarch slurry.
The secret is straining the puree to remove seeds and using a cornstarch slurry. Cooking it until it turns from cloudy to translucent creates that professional, ruby-red shine.
These bars are best within 3 days. Store them in an airtight container to keep the graham cracker crust from absorbing too much moisture and becoming soft.
This usually happens if the cream cheese wasn’t full-fat or if the heavy cream wasn’t whipped to stiff peaks before folding. Ensure you chill the bars for at least 6 hours to let the structure set.
The Final Recipe: No-Bake Strawberry Cheesecake Bars
No-bake summer desserts: The Ultimate Whipped Strawberry Cheesecake Bars
Ingredients
Equipment
Method
- Combine graham cracker crumbs, melted butter, and salt in a bowl until it reaches the consistency of wet sand.
- Press firmly into a parchment-lined 9x9 pan and freeze for 15 minutes to set.
- Beat softened cream cheese, powdered sugar, and vanilla until snow-white and perfectly smooth.
- Whip heavy cream to stiff peaks in a separate bowl, then gently fold into the cream cheese to maintain a thick, whipped texture.
- Spread the filling over the crust, creating a 2-inch thick even layer. Chill in the refrigerator.
- Heat strawberry puree, sugar, and cornstarch slurry over medium-low heat until it transforms into a thick, glossy, translucent ruby-red syrup.
- Cool glaze to room temperature before pouring over the filling. Chill the entire pan for at least 6 hours.
- Top with halved fresh strawberries and a tiny mint sprig just before serving for peak visual appeal.
Notes
Ensure the strawberry glaze is completely cooled to room temp before pouring to prevent melting the whipped center.
Join the Chilled Dessert Revolution!
There is nothing quite like the satisfaction of serving a professional-grade dessert that required zero time in a hot oven. These strawberry bars embody the spirit of No-bake summer desserts—effortless elegance, vibrant seasonal flavors, and a cooling touch that everyone appreciates. We would love to see your creations! Tag us on social media or follow our Pinterest for more inspiration. If you made a tweak to the glaze or used a different berry, leave a comment below and share your experience with our community of home cooks!