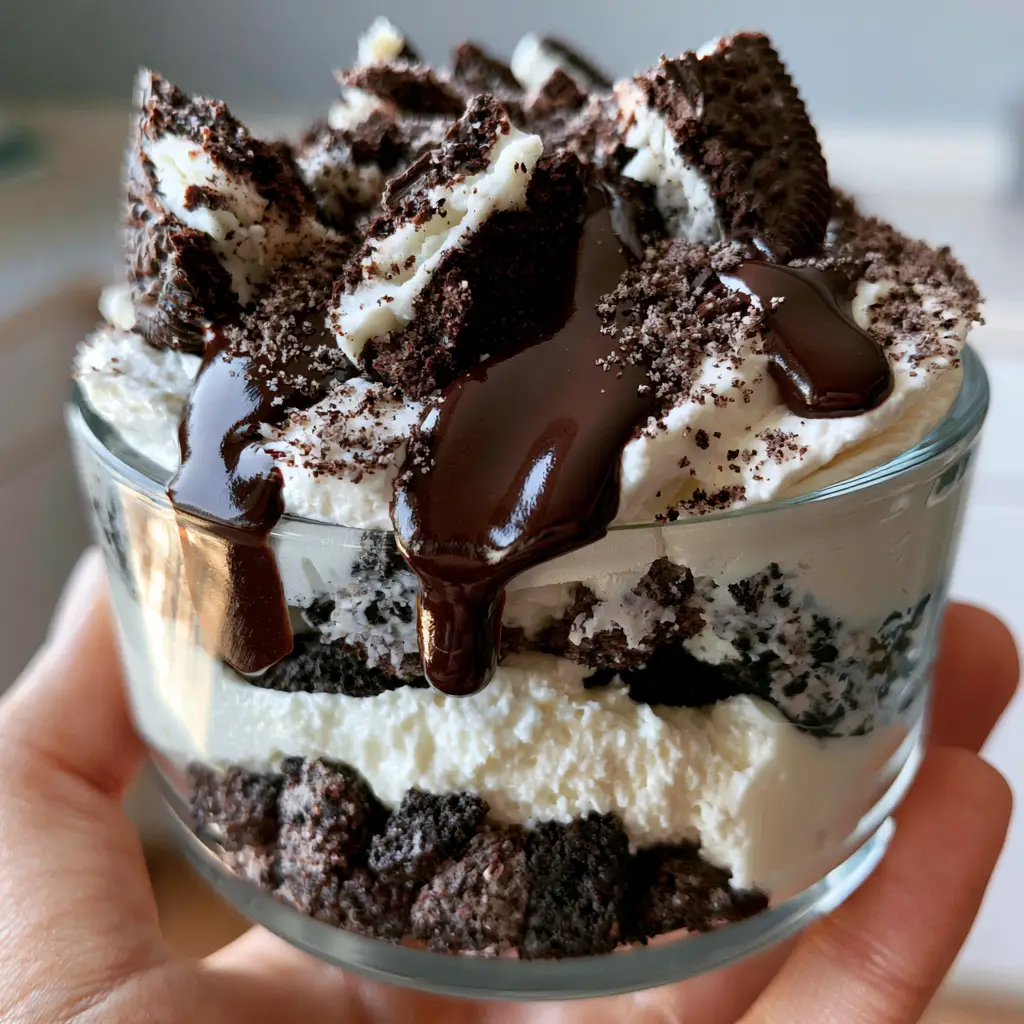
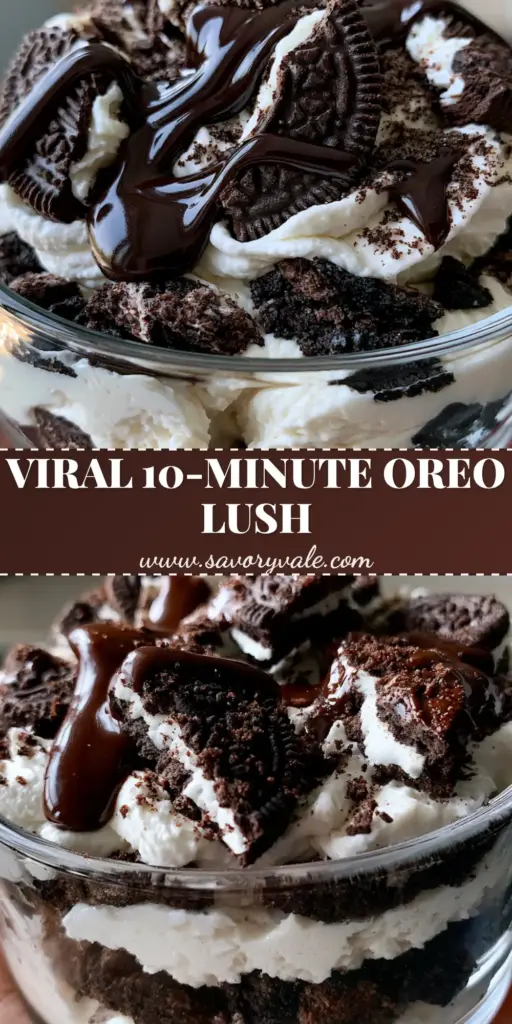
There is a specific kind of magic that happens when high-quality cocoa meets velvety dairy, and this no bake oreo dessert is the ultimate manifestation of that alchemy. Imagine a clear glass bowl showcasing distinct, thick vertical layers of texture—from a dark, rugged cookie base to a cloud-like cream cheese mousse. It is the kind of dessert that stops a room, not just because of its towering height, but because of the intricate details like fine cookie dust and glossy chocolate ripples.
Capturing the perfect “handheld smartphone photo” of this dish requires more than just good lighting; it requires a recipe built on structural integrity. By following this forensic culinary guide, you will achieve the exact visual results described: a shimmering dark chocolate ganache, a stark white middle layer punctuated by tiny vanilla bean specks, and a crown of fluffy whipped cream. This is not just a snack; it is a professional-grade Oreo Lush designed for the modern home kitchen.
Why This Cookies and Cream Masterpiece Works
- Textural Contrast: The foundation features coarse chocolate cookie chunks rather than a fine sand, providing a satisfying, rustic crunch that balances the airiness of the mousse.
- Visual Sophistication: The inclusion of real vanilla bean specks within the white cream cheese layer provides a gourmet “POV” aesthetic that looks incredible in close-up photography.
- Garnish Engineering: We use a three-tier garnish system: large broken Oreo pieces for height, a glossy chocolate drizzle for shine, and fine cookie dust for a professional finish.
- No-Bake Ease: This recipe relies on cold-setting science, making it the perfect centerpiece for no-bake summer desserts that won’t heat up your kitchen.
The Anatomy of a Perfect Layered Lush: Ingredients
To achieve the “thick vertical layers” seen in our visual blueprint, we must select ingredients that offer both flavor and structural stability. Here is what you will need for your no bake oreo dessert.
Standard Oreo Cookies (Approx. 36-40 cookies): These are used in three ways: coarse chunks for the base, broken pieces for the topping, and a fine dust for the final flourish. Their dark cocoa profile provides the necessary visual contrast against the white cream.
Unsalted Butter (1/2 cup or 115g): When melted and tossed with the coarse cookie chunks, the butter acts as a binding agent that hardens in the fridge, creating a “base” that doesn’t crumble when scooped.
Full-Fat Cream Cheese (16 oz or 450g): It is essential to use the block variety, not the spreadable tub version. This provides the “dense velvety” texture required for a stable middle layer that holds its shape under the weight of the toppings.
Powdered Sugar (1.5 cups or 190g): We use powdered sugar instead of granulated to ensure the mousse remains perfectly smooth without any grit, allowing those “vanilla bean specks” to shine through.
Vanilla Bean Paste (2 tsp or 10ml): While extract works, the paste provides the visible black specks that signify a high-end, professional dessert. This is key for achieving the forensic visual accuracy of the blueprint.
Heavy Whipping Cream (3 cups or 710ml): Divided for the mousse and the topping. Real heavy cream, whipped to stiff peaks, provides the “fluffy” and “cloud-like” texture that stabilized “cool whip” simply cannot replicate.
Semi-Sweet Chocolate Chips (1/2 cup or 90g): Combined with a splash of cream to create the “glossy dark chocolate ganache” drizzle that creates a shimmer under natural morning light.
Essential Tools for Professional Dessert Layers
Using a clear glass bowl is non-negotiable if you want to showcase the vertical layers of this no bake oreo dessert. A deep trifle dish or a wide glass serving bowl allows the light to hit the sides, revealing the “mousse” and “crust” transitions clearly.
You will also need a high-speed stand mixer or hand mixer to achieve the “dense velvety” consistency of the cream cheese. An offset spatula is your best friend here; it allows you to smooth the top of each layer perfectly against the glass, preventing the layers from bleeding into one another.
The Three-Phase Construction Process
Phase 1: Engineering the Coarse Cookie Base
In a large bowl, take 25 of your Oreo cookies. Instead of pulsing them in a food processor into a fine sand, use a rolling pin to crush them manually into “coarse dark chocolate cookie chunks.” You want pieces ranging from the size of a pea to the size of a marble.
Melt 1/2 cup (115g) of unsalted butter and pour it over the chunks. Toss until every piece is glistening. Press this mixture firmly into the bottom of your clear glass bowl. Use the bottom of a measuring cup to pack it down, ensuring a flat, even starting point for your vertical layers. Place this in the freezer for 10 minutes to set.
Phase 2: Creating the Velvety Vanilla Mousse
In your mixer, beat the 16 oz (450g) of softened cream cheese with 1 cup (125g) of powdered sugar and 2 tsp (10ml) of vanilla bean paste. Beat on medium-high until the mixture is completely smooth and you can see the “vanilla bean specks” distributed evenly.
In a separate bowl, whip 1 cup (240ml) of heavy cream to stiff peaks. Gently fold this whipped cream into the cream cheese mixture using a silicone spatula. The goal is to maintain the airiness while creating a “dense velvety” mousse. Carefully spoon this over the chilled crust, using an offset spatula to push it against the glass edges for a clean vertical line. If you enjoyed making this, you might also love our Key Lime Pie Trifle.
Phase 3: The Fluffy Crown and Forensic Garnishes
Whip the remaining 2 cups (470ml) of heavy cream with 1/2 cup (65g) of powdered sugar until fluffy peaks form. Spread this “top layer of fluffy whipped cream” over the mousse. For the ganache, melt your chocolate chips with 2 tbsp (30ml) of cream until “glossy” and smooth. Let it cool slightly so it doesn’t melt your whipped cream.
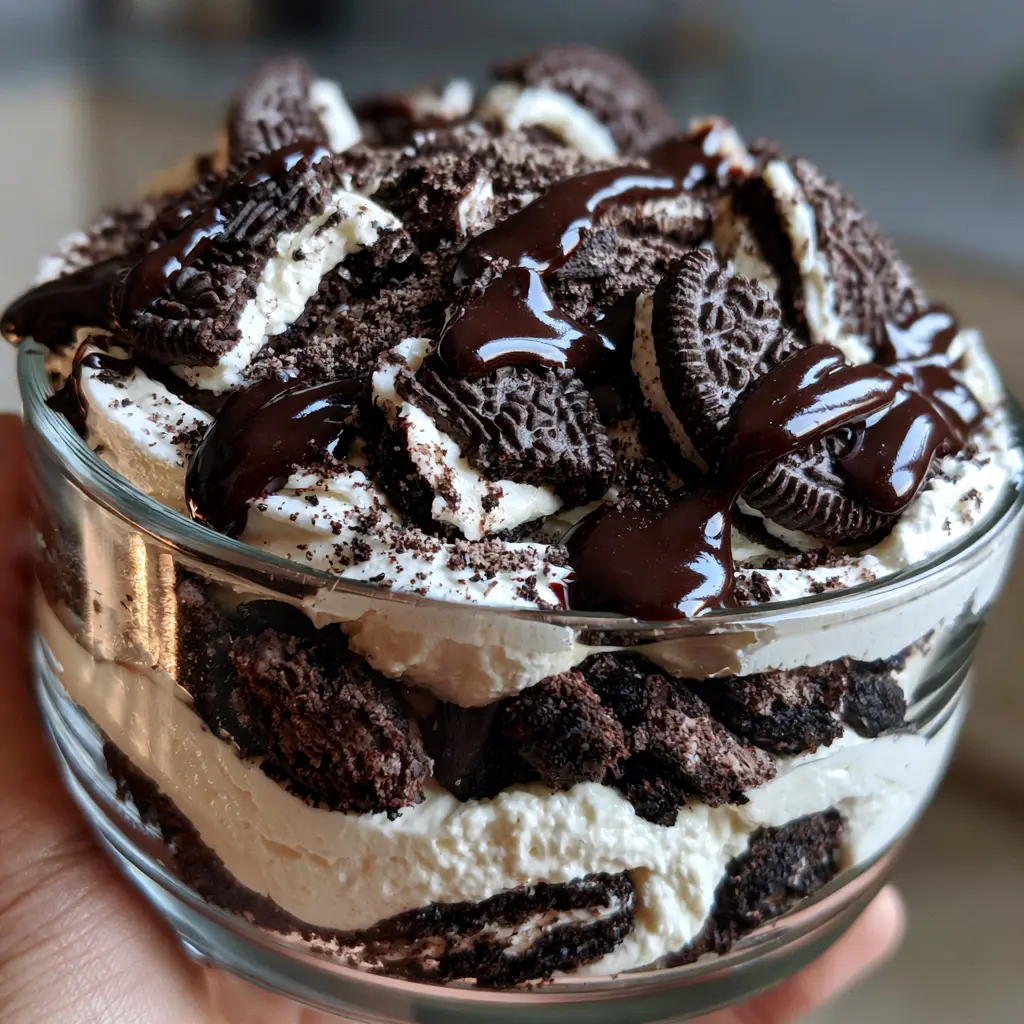
Now, perform the visual finish: Drizzle the ganache in a cross-hatch pattern. Take the remaining 10 Oreos and break them into “large broken Oreo pieces,” ensuring the white creme filling is visible. Nestled these into the cream. Finally, take 2 extra cookies, pulverize them into a “fine cookie dust,” and sprinkle lightly over the entire surface. This creates the “authentic food photography texture” seen in the midjourney prompt.
Professional Secrets for Sharp Vertical Layers
- Chill Between Steps: To prevent the white mousse from mixing with the dark crust, always freeze the crust for at least 10 minutes before adding the next layer.
- Clean the Glass: If any mousse gets on the upper part of the glass bowl while you are filling it, wipe it away with a damp paper towel before adding the whipped cream. This ensures the “thick vertical layers” remain pristine.
- Softened Cheese is Key: If your cream cheese is even slightly cold, the mousse will be lumpy. Leave it on the counter for at least 2 hours to ensure a “velvety” finish.
- The Ganache Temperature: Never drizzle hot ganache. It should be barely warm to the touch. If it’s too hot, it will sink into the whipped cream rather than sitting on top as a “shimmering drizzle.”
Preserving the Crunch: Storage and Prep Ahead
The no bake oreo dessert is best served after chilling for at least 4 hours, which allows the mousse to fully set. However, the cookies in the base and garnish will eventually soften due to the moisture in the cream. For the ultimate “handheld smartphone photo” experience with maximum crunch, add the “broken Oreo pieces” and “cookie dust” just before serving.
Stored in the refrigerator, this dessert will stay fresh for up to 3 days. Cover it tightly with plastic wrap to prevent it from absorbing any “fridge smells.” This is a fantastic option for parties where you need to prep in advance, similar to our cold appetizers that require zero last-minute cooking.
What to Serve Alongside Your Oreo Indulgence
Because this dessert is rich and chocolate-heavy, it pairs beautifully with salty or tart accompaniments. Consider serving it after a fresh chickpea feta avocado salad to balance the sweetness. If you are hosting a large gathering, a tray of ricotta pistachio honey bites offers a lighter, nutty contrast to the dense Oreo mousse.
For a full “no-bake” spread, you could even pair this with lemonade puppy chow for a citrusy punch that cuts through the cocoa richness of the Oreo Lush.
Frequently Asked Questions
Yes, you can assemble the layers up to 24 hours in advance. However, for the best visual ‘shimmer’ and cookie crunch, wait to add the ganache drizzle and broken Oreo garnish until just before serving.
It is not recommended. Low-fat cream cheese has a higher water content and is less stable, which may cause your middle layer to become runny instead of maintaining that dense, velvety structure.
The secret is chilling the crust first and using an offset spatula to smooth the cream cheese mousse firmly against the glass edges. This prevents the layers from bleeding into one another.
They are essentially the same dessert! ‘Lush’ typically refers to the velvety, mousse-like texture of the cream cheese layer, while ‘Lasagna’ emphasizes the stack of vertical layers.
Vanilla bean paste contains the actual seeds from the pod, which create beautiful black specks in the white mousse. This adds a gourmet visual appeal that is perfect for food photography.
The Complete No Bake Oreo Lush Recipe
No Bake Oreo Dessert: The Ultimate Velvet Oreo Lush Recipe
Ingredients
Equipment
Method
- Manually crush 25 Oreos into coarse dark chocolate cookie chunks using a rolling pin.
- Mix chunks with 1/2 cup (115g) melted butter and press into a clear glass bowl. Freeze for 10 minutes.
- Beat 16 oz (450g) cream cheese, 1 cup (125g) powdered sugar, and 2 tsp (10ml) vanilla bean paste until velvety and specks are visible.
- Whip 1 cup (240ml) heavy cream to stiff peaks and fold gently into the cream cheese. Spread over the crust.
- Whip remaining 2 cups (470ml) cream and 1/2 cup (65g) powdered sugar; spread over mousse.
- Drizzle with glossy chocolate ganache, top with large broken Oreo pieces, and sprinkle with fine cookie dust.
Notes
Wipe the glass bowl between layers for perfect vertical separation.
Closing & Call to Action
This no bake oreo dessert is the ultimate crowd-pleaser that delivers professional, high-RPM visual results with minimal effort. Whether you’re capturing the “soft natural morning light” hitting the chocolate shimmer or just diving in with a spoon, the combination of velvety mousse and coarse cookie chunks is unbeatable. If you loved this recipe, please leave a comment below and share your photos! Be sure to follow us on Pinterest for more indulgent inspirations.