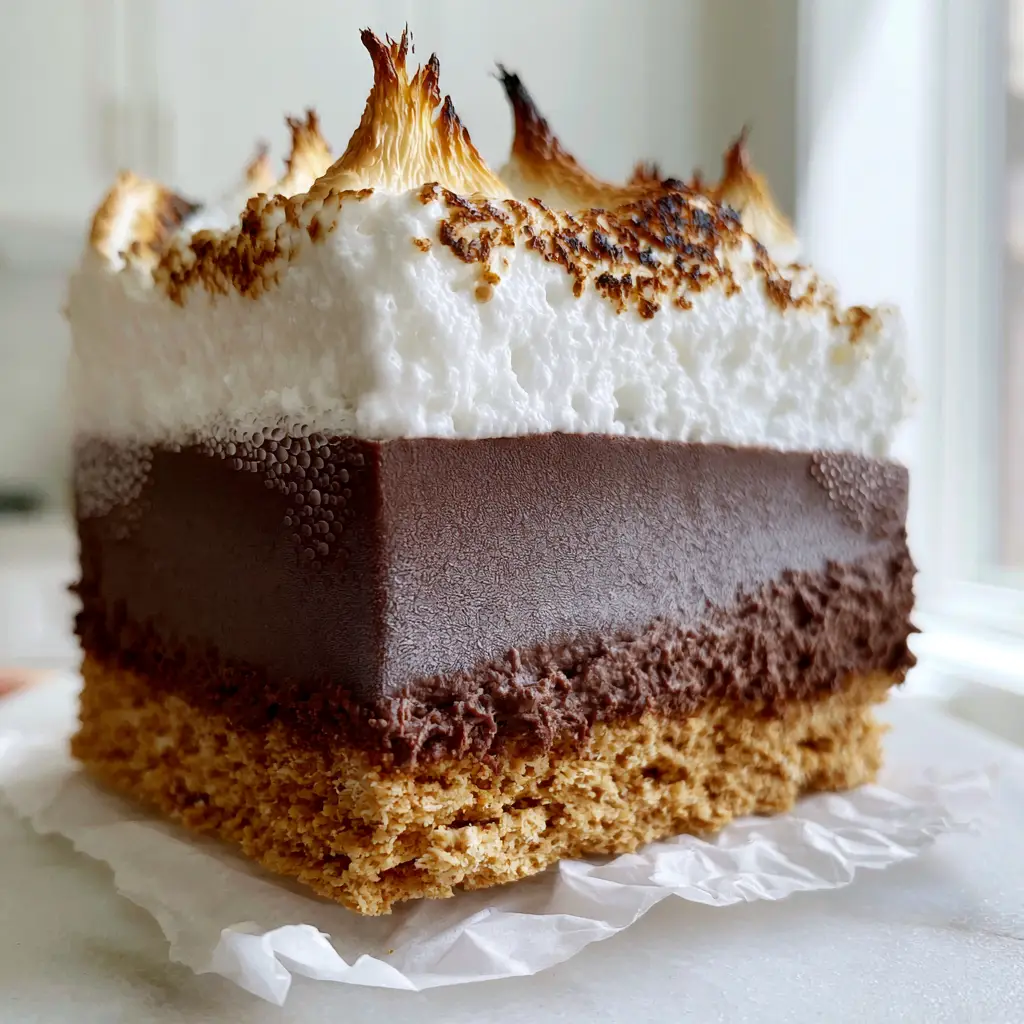
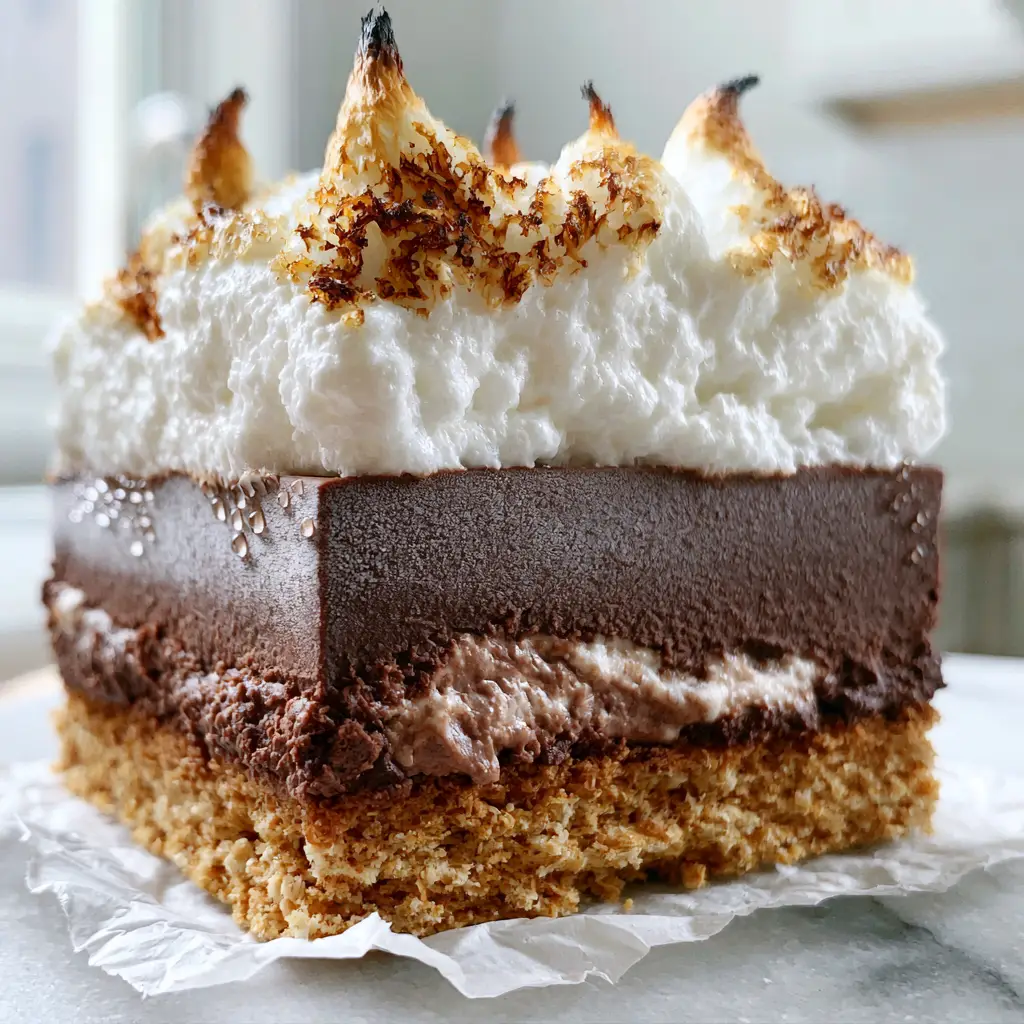
There is nothing quite like the nostalgic pull of a campfire, but when the summer heat becomes unbearable, the last thing you want is to huddle over a flickering flame. Enter the Frozen s’mores bar—a sophisticated, ice-cold evolution of the classic treat that trades messy sticks for sleek, professional layers. Imagine biting into a crisp, buttery graham base followed by a thick, velvety slab of dark chocolate ganache that has just started to develop tiny micro-condensation droplets as it hits the warm air.
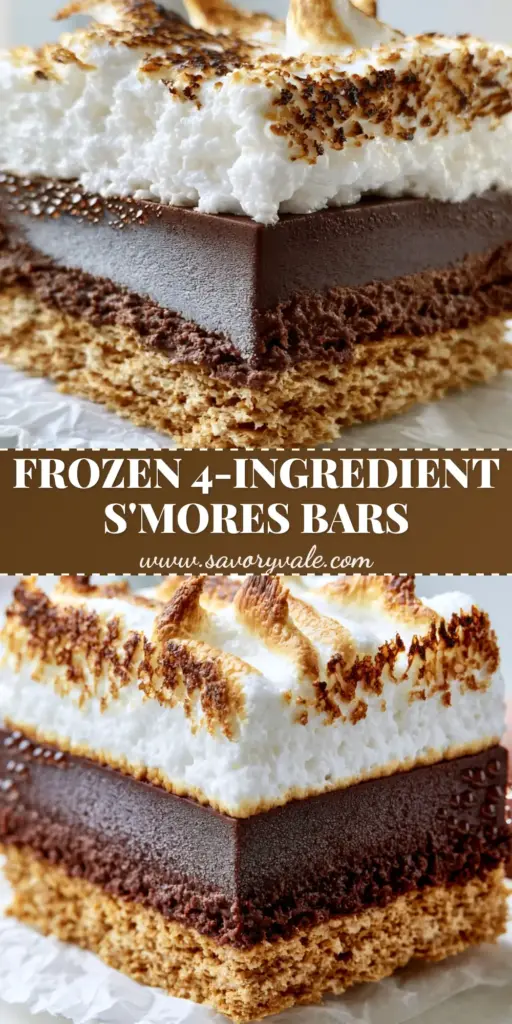
This isn’t just a dessert; it’s a structural masterpiece designed for the modern kitchen. The contrast between the frosty, matte-finish chocolate and the snowy white marshmallow fluff—complete with those signature charred peaks—creates a sensory experience that is both visually stunning and deeply satisfying. Whether you are hosting a backyard barbecue or looking for the ultimate addition to your no-bake summer desserts collection, these bars are the definitive answer.
In this guide, we will walk through the culinary science of creating perfectly straight layers and the forensic details that make these bars look like they walked off a professional photo shoot. We are capturing that handheld, macro-shot magic where the focus is razor-sharp on the texture of the toasted marshmallow and the creamy, fudge-like interior.
Why This Frozen S’mores Recipe Dominates Summer Entertaining
- Triple-Layer Architectural Integrity: Three distinct, perfectly straight layers provide a professional aesthetic that is rarely achieved in home kitchens.
- Temperature Contrast: The frozen, matte dark chocolate fudge provides a sophisticated bitterness that cuts through the sweet, airy marshmallow topping.
- Artisanal Textures: From the pressed golden graham cracker crust to the light dusting of graham crumbs on top, every bite offers a complex mouthfeel.
- Photogenic Finish: Designed to mimic high-end food photography, these bars feature charred peaks and micro-condensation that look incredible on any serving platter.
When you serve these, you aren’t just offering a sweet treat; you are presenting a gourmet experience. Much like our popular ricotta pistachio honey bites, these bars focus on the balance of textures and the quality of the raw ingredients.
The Essential Components for a Professional Frozen S’mores Bar
To achieve the visual result seen in our blueprint, we must use high-quality foundational ingredients. Each element serves a specific structural and flavor purpose to ensure the bars remain edible even when fully frozen.
The Pressed Golden Graham Cracker Base
2 cups (170g) Graham Cracker Crumbs: These provide the sandy, nostalgic flavor base and the golden-brown color required for the first layer. Ensure they are finely ground to allow for a tightly pressed, stable foundation.
1/2 cup (115g) Unsalted Butter, Melted: Butter acts as the “glue” for our crust. Using unsalted butter allows us to control the seasoning precisely, ensuring the base isn’t overly salty.
1/4 cup (50g) Granulated Sugar: A small amount of sugar helps the crust caramelize slightly and hold its shape once pressed into the pan.
1/4 tsp (1.5g) Fine Sea Salt: Essential for balancing the sweetness of the upcoming chocolate and marshmallow layers.
The Chilled Dark Chocolate Ganache Layer
12 oz (340g) Dark Chocolate (70% Cocoa), Finely Chopped: We use high-percentage dark chocolate to ensure a “frosty matte finish” when frozen. High-quality couverture chocolate melts smoother than standard chips.
1 cup (240ml) Heavy Whipping Cream: The fat content in heavy cream is what gives the ganache its thick, fudge-like consistency that stays creamy rather than turning into a hard block of ice.
2 tbsp (40g) Light Corn Syrup: This is a “science ingredient” that prevents the chocolate from crystallizing and ensures the layer remains flexible enough to bite through while frozen.
The Toasted Marshmallow Fluff Topping
2 cups (120g) Marshmallow Fluff or Marshmallow Creme: This provides the “snowy white” top layer. It remains soft even at sub-zero temperatures, unlike standard marshmallows which can become chewy and tough.
1 tsp (5ml) Pure Vanilla Extract: Adds a floral depth to the marshmallow layer, elevating it from a simple sugary topping to a gourmet component.
Extra Graham Cracker Crumbs for Dusting: A light dusting adds the final visual “forensic” detail required by our blueprint.
Tools Required for the Perfect S’mores Architecture
To get those perfectly straight layers, you cannot rely on guesswork. You will need an 8×8 inch (20x20cm) square baking pan lined with parchment paper. Leave a “sling” of paper hanging over the sides so you can lift the entire block out once frozen.
A kitchen torch is the non-negotiable tool for achieving those “toasted golden-brown charred peaks.” While an oven broiler can work in a pinch, the heat is too diffused and will melt your frozen chocolate layer before the marshmallow chars. A torch allows for precision “painting” of heat.
Finally, a long, sharp chef’s knife dipped in hot water is the secret to cutting through the layers without smearing the white marshmallow into the dark chocolate. This ensures the Frozen s’mores maintain their distinct, sharp-focus edges.
Step-by-Step Evolution of the Frozen S’mores
Constructing the Golden Foundation
In a medium mixing bowl, combine the graham cracker crumbs, sugar, and sea salt. Pour the melted butter over the mixture and stir with a fork until it resembles wet sand. Every crumb should be coated in butter to ensure the base doesn’t crumble when handled.
Transfer the mixture to your lined 8×8 pan. Use the bottom of a flat measuring cup to press the crumbs down with significant force. You want a “pressed golden graham cracker crust” that is level and dense. Place the pan in the freezer for 15 minutes to set this layer before adding the ganache.
Crafting the Velvety Dark Chocolate Ganache
Place your chopped dark chocolate in a heat-proof glass bowl. In a small saucepan, heat the heavy cream and corn syrup over medium heat until it just begins to simmer—do not let it come to a rolling boil. Look for small bubbles forming around the edges of the pan.
Pour the hot cream over the chocolate and let it sit undisturbed for 5 minutes. This allows the chocolate to melt evenly without introducing too much air. Gently whisk from the center outward until a glossy, thick fudge forms. Pour this over your chilled graham cracker base, tilting the pan to ensure it reaches all four corners in a perfectly straight layer. Return to the freezer for at least 2 hours until the surface has a “frosty matte finish.”
The Snowy White Topper and the Charred Peak Finish
Once the chocolate is firm, spread the marshmallow fluff over the top using an offset spatula. Do not worry about making it perfectly smooth; in fact, you want to create small swirls and “peaks” with the back of a spoon. These peaks are what will catch the flame of your torch.
Use your kitchen torch to lightly brown the edges and tips of the marshmallow. Move the torch constantly to achieve the “toasted golden-brown charred peaks” described in our visual blueprint. The smell of caramelizing sugar should be immediate and nostalgic. Immediately dust with a few extra graham cracker crumbs while the marshmallow is still tacky.
Expert Tips for Success with Frozen S’mores
- The Hot Knife Trick: To get those razor-sharp focus edges on the chocolate interior, heat your knife under hot running water and wipe it dry between every single cut.
- Managing Condensation: The “micro-condensation droplets” will appear naturally as the cold bars hit room temperature. For the best photos, wait about 2-3 minutes after removing them from the freezer.
- Stabilizing the Fluff: If your marshmallow fluff feels too runny, whisk in a tablespoon of powdered sugar to give it more body before spreading.
- Avoid Over-Torching: Marshmallow fluff has a high sugar content and can go from “golden” to “on fire” in seconds. Keep the torch moving in a circular motion.
What to Serve With Your Frozen Treats
These bars are rich and decadent, making them the perfect centerpiece for a summer dessert spread. They pair beautifully with other finger foods and appetizers. If you are hosting a party, consider balancing the sweetness with savory options like our bacon wrapped little smokies or a refreshing cucumber ranch salad.
For a full “no-bake” dessert table, these Frozen s’mores bars look stunning next to a key lime pie trifle. The contrast between the dark chocolate and the bright citrus of the lime creates a sophisticated palate for your guests.
Frequently Asked Questions
While a kitchen torch provides the best precision for charred peaks, you can use a broiler for 30-60 seconds. However, be extremely careful as the heat can quickly melt the frozen chocolate layer beneath.
Homemade marshmallow can work, but it often becomes quite firm when frozen. Marshmallow fluff or creme is specifically recommended because its sugar structure prevents it from freezing solid.
These bars can be stored in an airtight container in the freezer for up to 2 weeks. For the best texture and visual appeal, torch the marshmallow fluff fresh before serving if possible.
Use a long chef’s knife dipped in very hot water. Wipe the blade clean and re-heat it after every single cut to prevent the marshmallow from smearing into the dark chocolate layer.
This usually happens if the cocoa percentage is too high without enough fat, or if corn syrup was omitted. Ensure you use the heavy cream and corn syrup ratio provided to keep the ganache fudgy while frozen.
The Ultimate Recipe for Frozen S’mores Bars
Frozen S'mores Bars with Toasted Marshmallow and Dark Chocolate Ganache
Ingredients
Equipment
Method
- Combine graham cracker crumbs, sugar, and salt. Stir in melted butter until the mixture looks like wet sand.
- Firmly press the mixture into a lined 8x8 pan using a flat-bottomed cup. Freeze for 15 minutes.
- Warm heavy cream and corn syrup until simmering. Pour over chopped dark chocolate and let sit for 5 minutes.
- Whisk until smooth and glossy. Pour over the crust and freeze for 2 hours until the surface has a frosty matte finish.
- Spread marshmallow fluff over the chocolate, creating peaks with a spoon.
- Use a kitchen torch to toast the peaks until golden-brown and charred. Dust with extra graham crumbs and freeze for 2 more hours.
Notes
The corn syrup is essential to keep the chocolate biteable while frozen.
Closing & Call to Action
These Frozen s’mores bars are more than just a recipe; they are a summer ritual reinvented for the modern palate. By combining the science of a stable ganache with the artistry of a toasted marshmallow topping, you’ve created a dessert that is as beautiful to look at as it is to eat. The sharp layers, the frosty finish, and those charred peaks will make you the hero of your next gathering.
If you enjoyed making this architectural dessert, we would love to hear about it! Leave a comment below with your favorite summer memory or share your results with us. Don’t forget to follow us and save this recipe to your favorite boards on Pinterest so you never lose this summer staple.